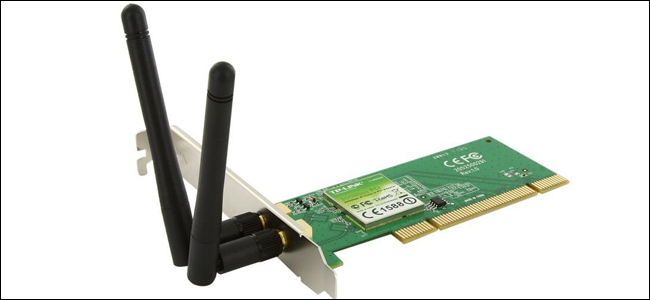
Most motherboards do not have wireless capabilities, except for some high-end models. To get WiFi on your computer’s desktop, you will need an internal wireless adapter (or card) that fits into the spare PCI Express slot on your motherboard.
The perfect solution for wireless connectivity is to use PCIe wifi cards. The PCIe Wifi Card attaches to your CPU easily and transforms it into a Wifi receiver device.
Although the steps for installing a WiFi card are simple, this guide will help you. You will only need a Phillips-head screwdriver (2 heads).
This guide will show you how to install the TP-Link AC1200 wireless card. It is an excellent value option that offers high speeds and strong signals at a reasonable price.
1. Find a Small PCIe Slot Available
The PCIe connector has been replaced by the PCIe type for internal add-on cards. There are many sizes of PCIe slots, including the full-length PCIe slot on a motherboard that is designed for graphics cards.
These slots can be used for add-on cards such as wireless cards. Your build may have a large graphics card. In this case, you will need to use the lower PCIe slot.
2. Take off the metal bracket from the case
Once you have determined which PCIe slot you want to use for your WiFi card for PC, remove the bracket from the back of your case. This can be done by using a screwdriver. This allows the wireless card’s rear bracket to fit into the back of your computer.
3. Insert Wireless Card into PCIe Slot
The card should be removed from the box along with the protective bag. Keep the card in the bag until you are ready to mount it. Once the card is taken out of the bag, grab it by the bracket. The exposed green circuitry should not be touched. However, you can handle the top or bottom or heatsink of the card (the large black/grey piece that lies on top of it).
Place the card in your case, aligning the connectors at the bottom with the PCIe slot. Then align the bracket with the back of the case. Next, push the card’s top into the slot until it is fully secured.
4. Secure Wireless Card for the Rear of Case
Use the 2 screws you took earlier to secure the wireless network card to your case. To ensure that the card doesn’t move around, you need 2 screws to attach the metal bracket to the card’s back. Use a screwdriver to tighten the screws.
5. Wireless Card Antennas: Attach and Position
The antennas that came along with your WiFi card are now installed. Attach them to the back of your card through the holes. These holes might have caps that you will need to remove. Use your hands to twist the antennas. Next, position them so they face upwards. This angle is the best for wireless antennas.
6. Download the latest Wifi card drivers (use CD if necessary)
The TP-Link T4E wireless card that we used for this build of PC worked right out of the box. We didn’t need to install drivers to connect to the internet. Instead, we could complete the Windows 10 installation (including downloading drivers), before going to the TP-Link website to download the latest drivers.
Windows 10 works well like this. It can automatically set up drivers for many devices, and can also find and install drivers automatically for wireless cards. Even if this happens, I recommend downloading the most current drivers for your wireless card.
Once you have installed your WiFi card, it’s time to do so. If you have a TP-Link Card, this means that you can go to the official TP-Link site and search for drivers for the card.
Be aware that not all wireless cards will work right out of the box. This is especially true if you don’t use Windows 10. To download the drivers, you will need to connect to a wired Ethernet cable before you can wirelessly connect your card to your computer.
If your wireless card came with a CD that contained the driver, it would be helpful to have that in case your card fails to work. This is especially important if you are installing an optical drive on your computer. If your WiFi card doesn’t have a CD, you can download the drivers online. It is impossible to know how old these CD drivers are.
Also Read: The Advantages of Working with a Remote DBA Consultant
Get the best signal with your internal WiFi card
Try adjusting the position of your internal wireless cards if you receive a weak signal. You might get a stronger signal by positioning them horizontally.
An extension cable and a base for antennas can be purchased to place on your desk. However, you should first position your computer so that your rear face towards your router. This will prevent your router signal from being blocked by other electronic devices or metal objects.
You may have a weak wireless signal, no matter how hard you try. If this happens, it might be time to get a new router.
Conclusion
You can learn how to insert a WiFi card into your PC with the help of this WiFi card installation guide. The PCIe wifi card installation is demonstrated step by step and we hope our introduction will help you get a better understanding of it.

